My ‘Are We Alone Together?’ post is a video response to Sherry Turkle’s book Alone Together. When the assignment was first mentioned a few weeks ago, my professor mentioned different ways we could go about it, two of which took over my imagination immediately: podcast and animation. My mind quickly jumped to “The Ricky Gervais Show” (If you haven’t seen it, click the link and enjoy! You can thank me for your new addiction later 🙂 ).
“The Ricky Gervais Show” takes the podcast done by Ricky Gervais, Stephen Merchant, and Karl Pilkington and animates it. Initially,I wanted to animate the whole thing, but it quickly became apparent that that would require me to ignore all my other classes, my wife, and my furbabies to get it done in time, so I tried a few different techniques to get the end product. I will break it all down below.
I’ve also made a Pinterest board for everything that I used to help me, as well as the music I chose. Click here to visit it.
Animation
The animation was the first aspect I chose to tackle because I had never tried it and I was very excited about it. I watched a lot of videos and read a lot of articles as to how to go about it. There seem to be a lot of websites and apps where you can get pre-made animation, only requiring you to change the scenery and add a voice over, but I wanted to do it from the ground up. I initially decided on using Paint to create (what I envisioned to be) a masterpiece, but right before I started I finally updated my computer and bought a Mac, which, of course, has no Paint program. I did a little Googling and found a free app named Paintbrush and downloaded it.
Paintbrush is very similar to Paint, but I did notice an issue when I was copying and pasting an image into the frame: it left little white pixels around the pasted image. This required that I touch up the color after. every. single. piece. was added.
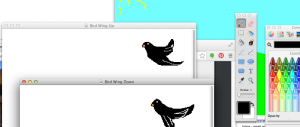
I made the frames by mimicking how the person in the YouTube video did (look on the Pinterest board). I created the background first and saved that as its own file. Then I created the bird; one shot of the bird with wings up and one shot of the bird with wings down. Next, I created three versions of the tulip: one vertical tulip, a right-leaning tulip, and a left-leaning tulip.
The hardest part was the human-like creations. I’m not a terrific artist, but I’m worse when trying to draw with a mouse. Tina and Miranda are very interesting looking, and the robot Miranda has had better days.
The next step was creating all the frames. I’d start with the background, add the specific tulip and bird, then the other characters. Then I would “save as” and order it. I did go back after the video was about complete and added ten more frames for the dance scene.
When all frames were complete, I imported them as pictures into iMovie and adjusted the speed.
What I learned:
Animation is a lot of work, but I enjoyed every second of it and I hope to do it again. For future endeavors, I would like to either draw the human characters out and upload them first then posting them in frame. Or just make them more “cartoon-like”, similar to the characters on “South Park”.
I wish I had made more frames, so the movement was more fluid.
Slides
I knew I wanted visual text on the screen as I was talking, but I wasn’t quite sure how I wanted to go about it. I ended up using Powerpoint to create the slides. I found an article that explained how to keep all of transitions and timing when converting it to a video. My version of Powerpoint is different than the one they used, it may be because it is on a Mac, so it didn’t work at all. I tested it on a few slides and ended up just saving them as JPEGs and exporting them to iPhoto, then importing them into iMovie.
What I learned:
I liked the slides in the video, but I wish I had been able to keep the transitions and the timing. On the slides with excerpts from Turkle’s book, I wanted to bring in the lines one at a time because I used a typewriter sound clip in the background. I think it would have been more visually appealing than watching a stationary screen for 30 seconds.
I would also use fewer slides and find another creative way to put up the material.
Video
I had two shots of myself, one at the beginning and one at the ending. I shot them using Photo Booth. I just happened to see the effects button and realized I could add effects to videos and not just photos. I loved the creepy Hologram effect, I think it worked well with the material I was covering, but it didn’t really match the slide themes. I also had issues with the audio level. When I imported it to iMovie, I turned up the audio as high as I could, but it just wasn’t enough.
What I learned:
I won’t use Photo Booth again to record. I’d prefer to find another software, particularly one with audio levels.
Audio
I chose four songs for the video: “Technologic” by Daft Punk for the intro and the closing credits; “Next to Me” by Emeli Sande for the first human/robot animation scenes; “At Last” by Etta James for the second set of robot/human animation scenes; and “IndieRock Instrumental” by Blanket Barricade for background music. I had to cut the background music because I could not get the audio levels right. As I was recording my voice overs, I was messing the audio levels to see which setting sounded the best. This actually made it harder when I was adjusting the levels so that the voice over audio was higher and the background music was lower. I found out that if I switched the background down to 8% during a voice over, it was too loud. If I adjusted it to 4%, it was non-existent. I finally gave up and just cut out the background music.
What I learned:
Next time I do a project with voice overs and background music, I will figure out the best recording levels for the voice over before I do ten minutes worth of talking. I really wanted that background music it; I hate that silence between voice over clips.
iMovie
I’ve only ever used iMovie on my iPad, and after my adaptation project, I swore I’d never use it again. I decided to see the differences between the iMovie on my iPad and the iMovie on my Mac, and my Mac had all the elements that I had wanted to use when I was making the last video on my iPad. I really enjoy it at this level of my video making skills. I know I will eventually want a more advanced program, but for FREE it is great.
What I learned:
I learned how to use a lot more features this time around. There are still some things I need to play with before I know the software in and out. I look forward to doing this again.
All in all, this project was a lot of fun. I got to try out things I had never attempted before. I am definitely going to explore animation more; I’m considering doing a 5-minute web cartoon for fun. When I finished the adaptation project, I walked away knowing what not to do again. Leaving this project, I feel like I’m walking away with new skills. I’m not super happy about the video: the audio is off and it is a bit boring; I wish I had included more comedy elements because that’s what I like to see. BUT I had so much fun learning how to animate on a very simple program. I’m walking away with a new ‘passion’. Ok, maybe not ‘passion’, but I am excited to make more animated clips, and I learned more about what I like and what I don’t.
“The Tiffany Ragsdale Show” will be available later this month. 😉 JK!!!!
Here are couple screen shots of my animation endeavor:


